


We’ve had a vision for this bus from the beginning. We knew we could take it out of the dreary, outdated cowboy theme from 1980 and turn it into a modern, comfortable home for our family. While we have made many, many steps in that direction already, building out the kids’ room feels extra special. They are the reason that we are even doing this whole thing to begin with. We want to show them...well, everything! We hope that this cozy little room will be the place they love to return to after days of adventures together.
We have four kids so that meant two bunk beds. The two main issues we had for this room were the height, or lack thereof, and the placement of the windows. The previous owner had removed the original bus windows and installed smaller RV windows in this room. They are right in the middle of the height of the walls. This made sense for the previous conversion with just two twin beds. However, this is not ideal for us because the best place for the top bunk (to give both upper and lower bunks equal headroom) would have been right in the middle of the window. These windows also function as emergency exits as they are made to be kicked out. We need to keep those windows free and clear.
We played around with many different layouts. Choice one - upper bunk above the window. This gives the bottom bunk more headroom and the upper bunk less headroom. The biggest problem is the curve of the roof makes the lack of headroom even more extreme. Choice two - upper bunk below the window. This gives the upper bunk more headroom and the lower bunk less headroom. The same smaller amount of headroom as choice one, however, because they will have the flat upper bunk above and not a curve, it actually has more overall space for head and moving around. Choice three - L-shaped bunks. We tried to see if we did some kind of staggered L-shaped configuration with two of the bunks across the back instead. Unfortunately, this would leave the bunks too short. With two teenagers, we really wanted the longer lengths of beds.
We finally decided on choice two. The lower bunks will have a bit less headroom than the upper bunks. The younger kids are actually pretty excited about it though. It will be more “fort-like”, they say. They will still be able to sit up enough to read or prop themselves up, they just won’t be able to sit perfectly upright. Because of this, however, we do want to keep the sides of the bunks completely open. We have seen many bunks that have fun half-walls with cut-out “windows”, making each bunk a little more enclosed. But, with these lower bunks already being a bit more closed in vertically, we didn’t want to close it up on the side as well.
That decision made, we had to figure out our materials for building the beds. Again, with a lack of vertical space, we wanted to use the thinnest materials we could yet keep the beds strong enough to support a teenager or two. Most of the bunks we have seen constructed in buses have been made with 2x4 construction. We decided instead to use ⅛” angle iron to make the bed rails. That will save us several inches in overall height for the bunks, allowing for the maximum amount of headroom.
Knowing that would be our main material for the construction, we then needed something sturdy on which to mount the rails. On the “aisle side” of each bunk, we made a lower “wall” that we screwed into the subfloor. We then drilled holes in our angle iron, painted it black, and used ⅜” carriage bolts to attach the rails to the “wall”. On the “wall side” we screwed the rail into the ¾” plywood we had previously installed below our slatted wall treatment.
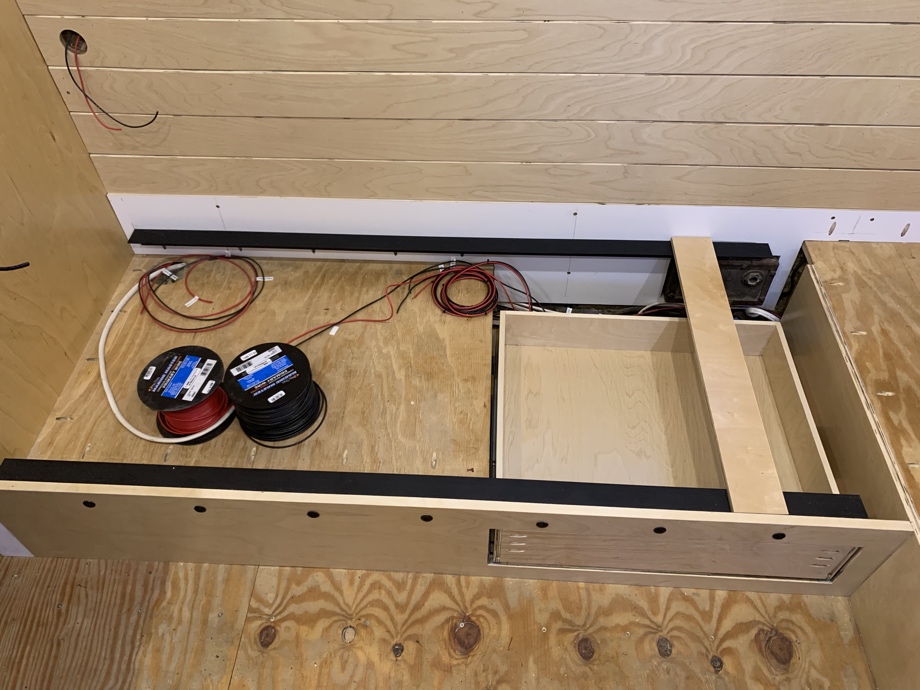
We hadn’t made the bed slats yet, but we positioned the rails so that once we attached the ½” slats, the lower beds will be perfectly aligned with the rear bench. Then, the mattresses can extend all the way to the back of the bench. These rails are very sturdy, being attached to the wall which is attached to the floors.
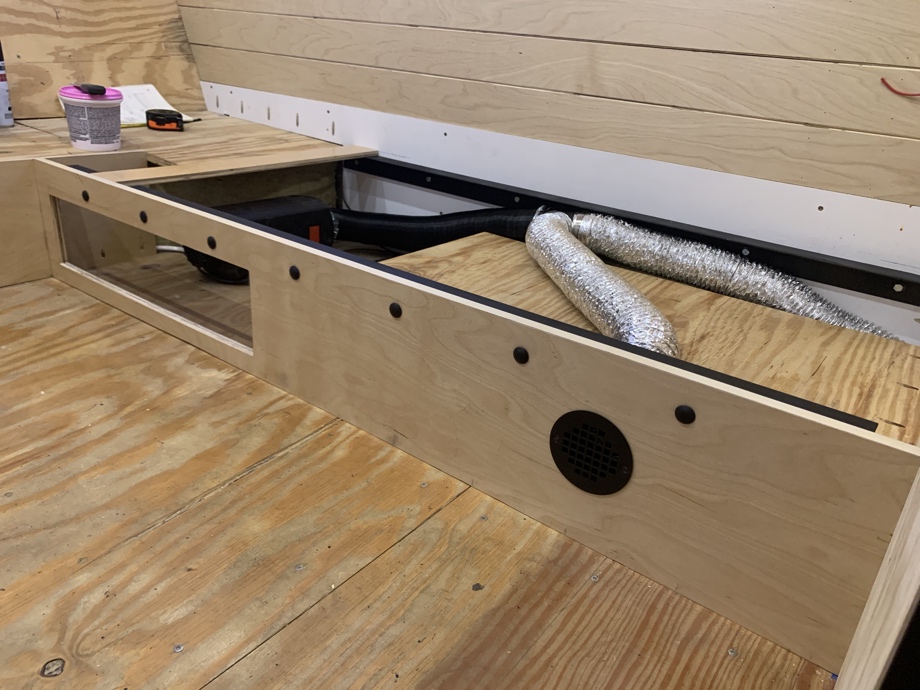
The lower bunks are built just over the wheel wells, however there was free space below about half of the bed. On the passenger side, we had already installed a diesel heater in that space under the bed. In the accompanying video, we show you how we tee’d off the heater vent hose to run into the bathroom and into the bedroom through the lower bunk “wall”. On the passenger side, all the extra space is unaccounted for, so we built a large drawer into that space. The driver’s side will have a matching “drawer face”, but it will only give access to the heater and just a small amount of storage.
We were so excited to get going in the kids’ room. They loved the direction it was heading.
Coming up next: Wallpaper in the kids’ room and building the upper bunks.
Watch the video:
Click here If you cannot see the video.


0 Comments
Comments powered by Disqus