


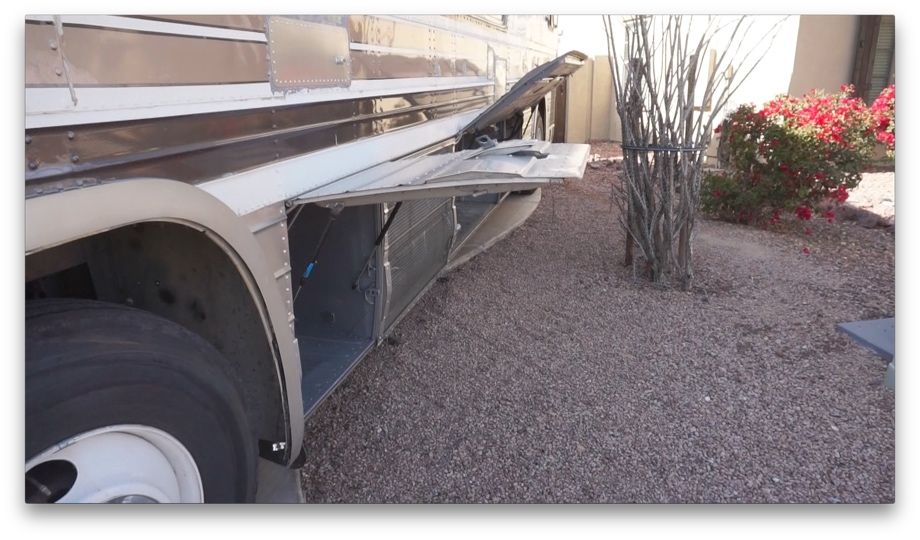
Whack...thud! Those were the sounds my head and backside made as my head rammed into the edge of the open bay door so hard it knocked me off my feet and onto the driveway.
It was a hot, sunny day while Juan was working in our electrical bay. We had propped up our sport umbrella to shade him while he worked. This, however, concealed the open bay door, which actually would only stay about halfway open, essentially leaving the door sticking straight out parallel to the ground. When Juan asked me to bring him a tool, I hurried in head first while trying to move aside the umbrella, not remembering that the door was sticking straight out. That’s when I saw stars, literally. Pretty sure I got a concussion along with a nice goose egg on my head that day. After that, we started using a very high-end concoction of bungee cords to hold that bay door up. We’re nothing if not classy around this joint.

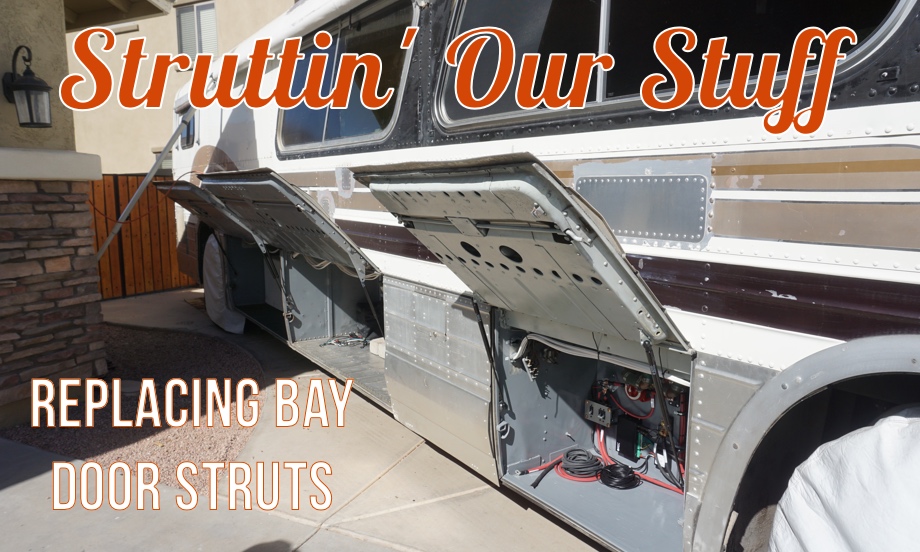
That was not the only bay door that wouldn’t stay up in place. In fact, only one of the doors actually held up nicely. After months of ducking under the offending perpetrators, we finally decided to do something about it.
When the bus was in service, each bay door had one telescopic support prop on the right-hand side of the door. During the bus’s original conversion, the previous owner had replaced those with gas struts on the doors, putting two on some doors and leaving only one on some doors. Naturally, these struts wear out over time. Some of them had even severely bent due to poor installation. Unfortunately, it wasn’t just as simple as buying replacements. Each of the doors had different weight and length struts on them. We really wanted to at least make them all the same length. That way, we will only need to keep one or two extras on board in case we one breaks. We don’t want to keep multiple different lengths and weights in supply.

We used the length of the struts on the one door that actually opened correctly as our standard. That ended up being 300mm closed length and 500mm extended length (close to 12” and 20”). Next, we had to decide on the weight for each one. Our bus has three different sizes of bay doors. We will call them double door, single door, and a ⅔ door. We had to take our best guess for weights based on what clearly wasn’t working with what was already on these doors. We were also going to be adding a second strut to the doors that only had one, so we tried to take that into account when deciding on strut weights.
For our first guess, we tried 120lb for the double doors and 80lb for the single and ⅔ doors. After installing the two 120lb on our first double door, we quickly realized those were too strong. It was very difficult to push the door closed and then when opening it, the door popped up way too hard. We also worried about having too strong of spring because they are much harder on the rubber hinges and tend to rip them prematurely. Luckily, the 80lb struts we bought for the smaller doors worked well on the double doors. Following, the 80lb struts were too strong for the single doors, so we bought some 40lb struts. These weren’t strong enough. We were starting to feel like Goldilocks. Well, the 40lb struts worked well on the ⅔ door, but we finally settled on 60lb struts for the single doors.
So, to review: double doors= two 80lb struts, single doors=two 60lb struts, ⅔ door=two 40lb struts.
Alright, now onto how we actually rebuilt the brackets to hold the struts. **Sometimes, I find it difficult to describe a particular project in words, and this is absolutely one of those cases. I’ll give it a shot, but the video will explain this much better.
Part of the reason that the previous struts were all different lengths was that the location of the brackets wasn’t standardized. On a few of the doors, one of the original brackets from the original lift system was used. 
On the other side, the previous owners made their own bracket. Then, those new brackets were installed too far back or too high up. It made the necessary lengths all different.

We came up with a plan to make the brackets and their location standardized, allowing us to have only one length of strut necessary.
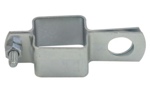
We essentially wanted to copy the size and location of the original bus bracket and simply put them on the other side of the bay. We found some small brackets at Tractor Supply that we were able to modify to work. We bought some 10mm ball studs, drilled a hole in the bracket for them, and then screwed those in. Then, we needed to drill out some rivets that were in the exact location to mount the new brackets, and then secured the brackets with grade 8 bolts.

We also had to either modify or attach new brackets for the other side of the struts that attach to the underside of the doors.

Finally, we had all the brackets standardized, and we were able to attach all of our new gas struts. Although we have them in three different weights, since the struts are now all the same length, we can just have a couple on hand in case we need a replacement. Success!! All of our bay doors open all the way and stay up! Now, hopefully, I won’t hurt myself on them anymore.


One more bay door project that will happen sometime soon is replacing the rubber hinges. They are in pretty sad shape. We already have the new hinges ready and waiting. Do any of you have tips or tricks for us on replacing those hinges before we check that one off the list?
Watch the video:
Click here If you cannot see the video.
Parts We Used
80 lb. 20" Gas Strut
60 lb. 20" Gas Strut
10mm Ball Studs
10mm Ball Stud Bracket
10mm Ball Stud Flat Mounting Bracket
-
 1-1/4" Square Boom Clamp


0 Comments
Comments powered by Disqus