


We finally have all our electrical connections wired up and our BMS working. It is time to fire up our Victron inverter and see if everything works! Before we do that, we will explain why we decided on this particular inverter, briefly recap how we wired it up, give a brief introduction to the software setup, and finally run our first loads on the inverter.
Narrowing Our Inverter Choice
After we decided on a 48V configuration for our Nissan Leaf battery, we had to select an appropriate inverter. Because there are so many options, we decided to make a list of the things we were looking for in an inverter. This piece of equipment is at the heart of our electrical system, so we didn't mind spending a little more money to get a very high-quality unit, preferably an inverter that works as part of a system. Some of the criteria we ended up landing on:
- Extremely reliable and durable
- At least 4000 Watts of power at 120V
- Integrated charger for the 48V battery that can handle lithium batteries
- High efficiency
- Works nicely with a BMS unit
- Power boosting capability
- Remote control and display
- Works nicely with a large solar array
The good news is that there are many, many great choices. We looked at offerings from AIMS, Magnum, Xantrex, Outback, Sunny Island, Schneider Electric etc. 48V has recently become very fashionable, so there are many options. We swam through the information reading and watching as much as we could find on forums, blogs, and YouTube.
One company that kept standing out was Victron Energy. Space and power requirements narrowed our selection in the Victron Inverter/Charger line to the Victron Quattro - more specifically the "Victron Quattro 48/5000/70-100/100 120V".
The more we researched about this inverter the more we were convinced that it would be the perfect pairing for our Nissan Leaf battery. It hit every single one of our desired bullet points and surprised us with a few things we didn't even know we would like.
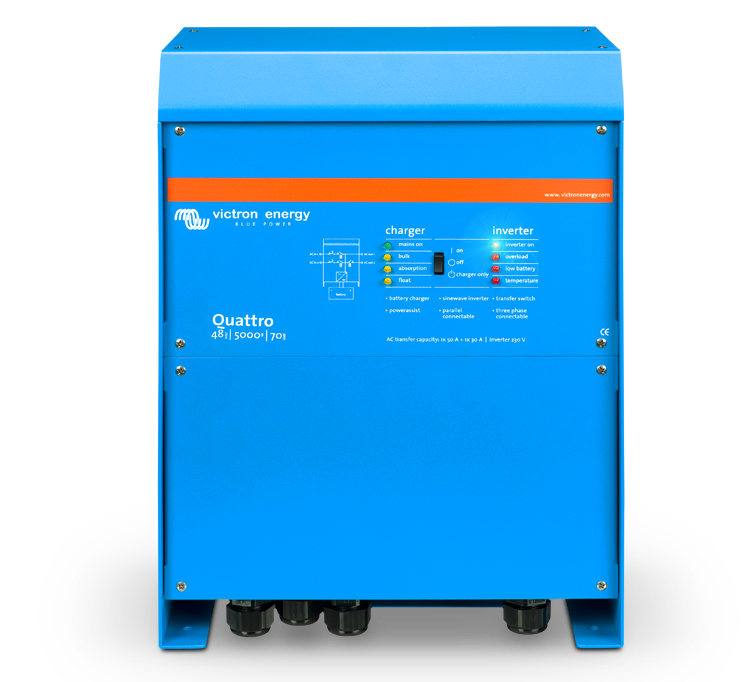
Victron Quattro 48/5000/70 100-100 120V Features
Build Quality
This Victron Inverter is seriously stout. It weighs about 70 lbs and is constructed of very thick aluminum. All electronic components are sealed with some kind of resin and the terminals for hooking up the wires are all very robust. Every review we read on the Victron Quattro was glowing and positive. When we received the unit we could see why.
Power Output
5000 Watts should be plenty of power for when we are boondocking or running off the batteries. 5000 Watts equates to about 42 Amps @ 120V. The maximum output power of this inverter is 10,000 Watts for a short period of time (to deal with spike loads or high Locked Rotor Amps (LRA) of many electric motors). It should be noted that maximum power is achieved at an ideal temperature of 77 degrees F (25 degrees C). All inverters maximum power is a function of ambient temperature, but Victron was one of the only ones to explicitly document this limitation. If 5000 Watts is not enough power, up to six Victron Quattros can be configured to operate in a parallel configuration with power up to 30kW. These can also be configured for 240 Volt split phase power or even 230 Volt three phase power.
Lithium Compatibility and Fully Programmable Battery Charger
Input power on the Victron inverter is from 37.2 Volts to 64.4 Volts. Our lithium battery absolute maximum is 58.8V (14 * 4.2 Volts) and absolute minimum is 42 Volts (14 * 3.0), perfectly within the operating Voltage for the inverter. The charger is also fully programmable with different profiles for common batteries including an option for lithium batteries (a linear profile).
High Efficiency
Victron continually ranked at the top of the list when compared with others for efficiency. The Quattro 48/5000/70 100-100 120V is rated at an amazing 95% efficiency, only drawing 35 Watts when idle (15 Watts in Search mode).
BMS Compatibility
We found that the REC BMS communicates with the Victron Color Control GX natively to control not only the internal charger but also the Victron MPPT Controller all through the Victron CAN bus interface.
Power Boosting Capability
The Quattro has the ability to supplement the capacity of incoming A/C power. In practical terms what this means is that if the power loads in the bus surpass the available incoming power (shore power or generator), the Quattro will take power from the battery to ensure that everything keeps functioning as it should. Once the load dies back down, it will take any surplus power and continue to charge the batteries.
Remote Control and Display
Victron really provides a great "system" that gets all tied together with the Color Control GX. This little device provides a detailed overview of what is going on with the system. It displays graphically the state of charge of the battery, how much power is being consumed and from where it is being consumed, and how much solar energy is being harvested. It also allows control of Victron attached components like the Quattro and Smart Solar MPPT Controller. It also provides full access to the Victron Remote Management (VRM) portal. This portal allows access to the information from anywhere in the world.
Solar Compatibility
Another big selling point for this inverter is the seamless integration with the Victron MPPT Solar Charge Controllers. When coupled with the Color Control GX it shows a clear picture of where power is coming from as well as how much load is on the system. It also communicates with the BMS through the Color Control GX to keep the batteries safe.
Other Considerations
A pleasant surprise was how "hacker friendly" Victron is. They even have an entire GitHub repository where they share code to interface with various components. One very popular one is the ability to run the Venus image (basically a Color Control GX with no screen) on a common $30 Raspberry Pi.
Wiring the Inverter
The Victron Quattro is named such because it contains four A/C inputs and outputs. This makes certain configurations very convenient and allows wiring to be much more straightforward. The Quattro features two A/C inputs and two A/C outputs. You might ask yourself what the benefit of such a configuration is.
2 A/C Inputs
Many inverters come with only one A/C input, especially if they are inverter/chargers. Why would anybody need two? Actually, most people could actually benefit from two A/C inputs. The first input is likely used for shore power and "plugging in" to a pedestal at an RV park. The second input can be used for a generator. Most RVs come with an onboard generator. Without a second input on the inverter, you either have to "plug-in" the shore power connector to the generator or somehow otherwise wire it in into the 120V A/C side. Having two A/C inputs simplifies the wiring and allows the Victron to prioritize power delivery from multiple sources.
2 A/C Outputs
In the same way, having two A/C outputs can be very convenient. How so? Consider the following scenario. Many RV owners have electric appliances that they only want to be powered when they are either on shore power or when connected to the generator. These items often include things like electric water heaters, refrigerators, air conditioning systems. The problem is this often requires more complicated circuitry. This is exactly what the second A/C out on the Quattro is designed for. It will only have power when there is an A/C input present. No need for transfer switches or fancy wiring.
Battery Wiring
Of course, to be useful the inverter needs to be connected to a battery. This is done via four beefy terminals. Why four? Because these inverters are designed with the ability to run in parallel configurations. They can be connected in parallel right from dedicated terminals.
Network Connection
In order for the Victron Quattro to talk to the Color Control GX, it needs a simple network patch cable. This cable then runs to the rear of the Color Control GX.
Software Setup
Software setup on the Victron inverter requires a special cable for connecting it to a PC. This cable is called the "Interface MK3-USB" cable or the "Interface MK2-USB" cable. The other side of the cable uses a simple Cat 5 network patch cable to connect to the VE.Bus network connectors on the inverter. The software provided is called "VE Configure tools for VE.Bus Products".
Once we installed the software and all the proper drivers had updated, we connected the interface cables and turned the inverter on. At this point, we selected the virtual COM port from the menu and the software started connecting to the inverter. Once it downloaded all the parameters from the inverter, it displayed what power the inverter was consuming as well as providing.
Within the software, we were able to set things like A/C power limits, low voltage alarms, and shutdown thresholds, as well as the profile for the battery charger. Once all the correct settings had been entered, we simply pressed "Send to Inverter", and it sent all the configuration to the inverter. The software is very easy to use and navigate.
Running Our First Loads
Our batteries have been sitting idle for the past year and four months. Who knows how long they had been sitting in the salvage yard before that. Amazingly enough, the voltage of the cells has stayed exactly the same as the first day we took the batteries apart. We were not sure what kind of charge they had, so we did not want to put a sizable load on them until we had the opportunity to charge them up to 100%. However, we wanted to ensure that the inverter was fully functional.
We have a small air conditioner in the battery bay that draws a maximum current of 4 Amps. This seemed like the perfect test for the system. We flipped the breaker, crossed our fingers, and plugged the little A/C unit in and ... It fired up right up without a hiccup and started blowing cold air. Woohoo!!! It's funny that just the lights and sounds of a small a/c blowing felt like such a huge accomplishment...and a huge sigh of relief.
Unfortunately, it was getting late and we needed to return the bus, so the full charge and a larger load test will have to wait until next week. For now, we can rest assured that our battery appears to be working, the BMS is doing its job, and the inverter is making usable power!
Cost
Retail on this inverter is fairly pricey, right around $3200.00. Most places on the internet have it listed for about $2900.00 or so. Like everything else we shopped around to see where we could find the best prices. We even got a list of distributors from Victron's website. One place had it considerably lower than anywhere else. AM Solar had it for an amazing $2099.00 and only $45.00 to ship it to my house! I even had the lady on the phone double check it to be sure it was correct "hmmm ... you mean $2999 right?". "Ummm ... let me double check - nope - two-thousand and ninety-nine". "Uh yeah - hold on I am getting my credit card".
Final Thoughts
So far, we are very happy with our choice of the Victron Quattro 48/5000/70. We have emailed with the folks at Victron several times, and they have always gotten back to us quickly and been helpful. It has been a fairly straightforward installation and setup process, and on our first time powering up the system, it did exactly what it was supposed to do...give us power. We will definitely keep you all updated once we really put the system through its paces once we are on the road. Up next in Part 2 of the inverter overview, we will fully charge the batteries and put the system through a larger load test.
Watch the video:
Click here If you cannot see the video.

0 Comments
Comments powered by Disqus