


When we first started researching the idea of becoming full-time RVers, one of the lifestyle questions we had was, “What about laundry?” As we began to read more about the day to day life of a fulltime RVer, we learned the pros and cons of the laundry options.
Option 1: Laundromat
On one hand, there’s the laundromat. It certainly is nice to get all of your laundry done in a couple of hours, using multiple large machines at once. In addition, I have found that many RVing mamas enjoy the time each week at the laundromat to have a small moment of solitude. However, there are a few downsides to the laundromat choice. First, money. It can get expensive, especially for a larger family like ours. Some of our friends say they spend $20-40 per week on laundry. Yikes! In addition, the time it takes to do laundry may only be a few hours, it is still time away from family or adventures. Finally, we have certainly heard horror stories of the cleanliness level of some machines. A couple of us in our family have sensitive skin and not knowing what has been in a machine before my laundry is a little concerning.
Option 2: Onboard Washing Machine
The other option for laundry is having an onboard washing machine. There are different options available in this arena, including everything from portable machines to stackables to combo units. Because of the size of our bus and the number of people in our family, the combo unit was what would probably work the best for us, so we focused our research on this option. There are ventless and vented choices, of which we have heard vented is the absolute best way to go. For a vented combo unit, the upfront expense may be a lot, however, it would be cheaper than weekly laundromat expenses over the course of 6-12 months. The ability to simply throw in a load or two every couple of days, continue on with my day, and come back to finished laundry is definitely a bonus. In addition, knowing that our machine is clean, saving a couple of hours each week, and not having to research and search out laundromats all are perks for us. On the downside, the loads are much smaller, so we would have to do smaller loads more frequently. The combo unit will take the place of more storage in the bus. It uses power and water - do we have enough to make this feasible? It also adds additional weight.
Our Choice
After looking at all of these pros and cons, we decided to move forward with looking for a vented combo washer/dryer. We were willing to give up a small amount of storage to have the flexibility of doing laundry whenever we wanted in a clean space and save some money along the way. As we considered our options, one brand and model kept being recommended. The Splendide 2100 XC.
Luckily, we found a sweet couple that were selling their Splendide 2100XC. They had only used it for about five months, but they were headed back to a house so they didn’t need it anymore. In fact, when Juan went to pick it up, they were finishing up a load of laundry so he was able to see it working. We bought it for about half the price of new ($600 vs $1200 new) and it was in perfect condition. We decided to try it out in our house for a week and decide if we really like it. If not, we figured we could always just resell it.
Splendide 2100XC Test Drive Results
During the week that we brought it in the house to use it, we ran eight loads of laundry. We tried many different settings to figure out what worked best. Because the washer and dryer are all the same unit, you have to be careful not to fill it all the way up or the clothes will not dry well and will be very wrinkled. We found that filling the drum about ½ to ⅔ full worked well. Surprisingly, even at half full, I was able to fit much more clothes in there than I anticipated. I would say it was about half as much as I typically fit in my large front-loading washing machine! From some of the other reviews I had read, I was afraid I would only be able to fit a couple of shirts and maybe a pair of pants. That is not true at all. I could fit about two days worth of clothes for all four of my kids in one load! That maybe does not include jeans, but definitely all of their shirts, pajamas, shorts, underwear, etc. I could also fit about two to three days worth of clothes for Juan and me in one load.
The biggest lesson we learned with this machine is not to run the dryer for too long. If we let the dryer go too long, the clothes were burning hot and wrinkled (even at a small half-load). The sweet spot for a normal load for us seemed to be a normal wash and then 60-minute dry. At this point, lightweight clothes were dry but not crazy hot. Slightly heavier clothes like a sweater or jeans or thicker shirts were slightly damp. They maybe had a few wrinkles, but since they were a bit damp, I could just shake it out and they would air dry in about 20 minutes wrinkle-free. Adding a small bit of softener (which we don’t like using, so we use vinegar) also seemed to help with wrinkles.
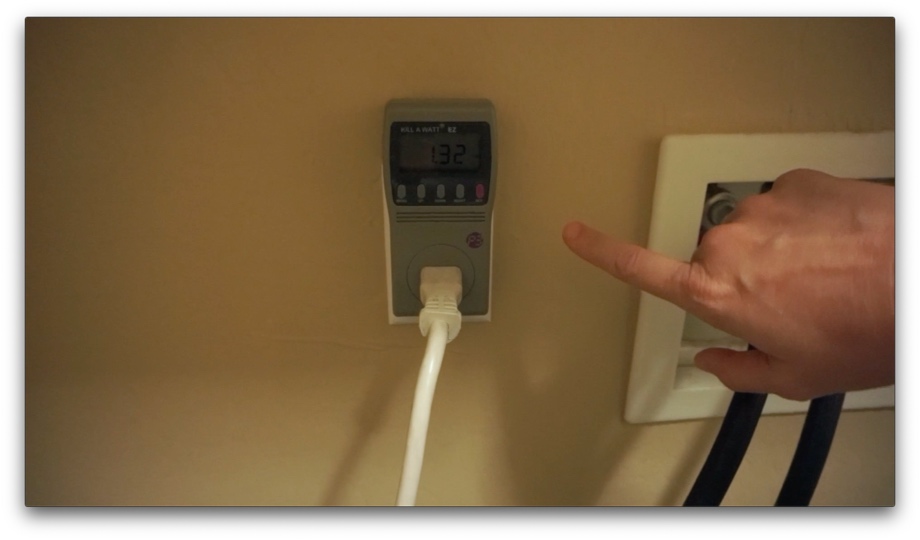
While running all of these loads, we were also measuring both power and water usage. To see how much power was being used, we plugged the machine into our kill-a-watt. This showed us that for a typical load with a 60-minute dry time, it was using on average 1.3 kWh.
 To measure water use, we ran the drain line into a large plastic tote.
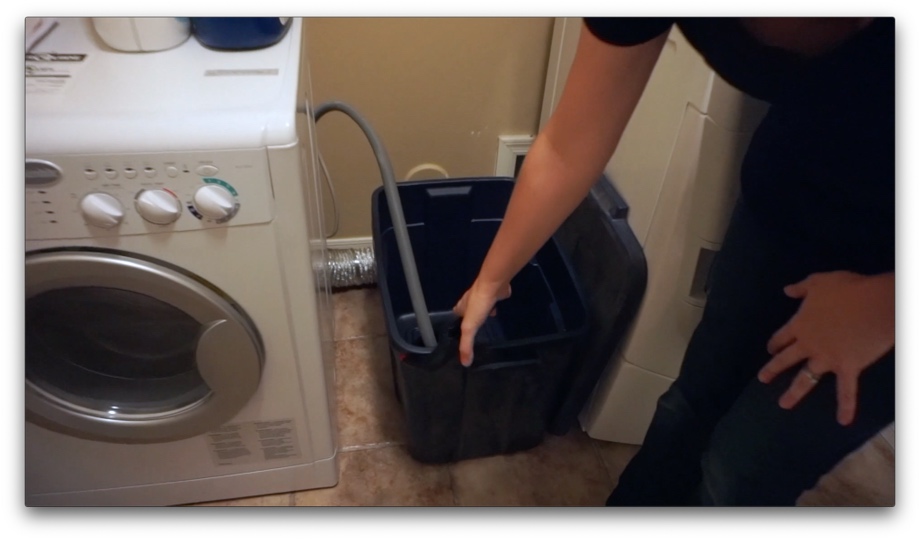 After each load, we then used an empty gallon milk jug to measure out exactly how much water was used. For our loads, all about ½ to ⅔ full, the machine consistently used 10 gallons of water. I’m sure if we were washing heavy items like blankets, it would have used slightly more, and if we were washing a small load of delicates, it would have used slightly less.

If we are using hookups, then water and power consumption will be a non-issue. However, would it be practical or even possible for us to do laundry while boondocking? For power usage, this should not be a problem for us because of our large battery and solar system. However, water will be our limiting factor. We do have a large freshwater tank at 163 gallons, but we also have six people. How we decide to use those gallons while boondocking will determine if we are able to possibly run maybe one or two loads during a week. We for sure would not be doing laundry every day if we are boondocking for a week or more, but we might be able to just do one or two loads.
After all of our experimenting and measuring, the biggest question was, “Did we feel like the clothes really came clean?” Because we were catching all the drain water and dumping it, we were able to see all the dirt and soap that came out. You’ll just have to take my word for it, but the answer was a resounding Yes! A significant amount of dirt came out of the clothes along with all the soap. The clothes looked and smelled clean and fresh.
We were quite pleased overall with the performance of the Splendide 2100XC during the week we used it in the house, so we decided to move forward and install it in the bus. We know that we will still need to use a laundromat periodically for larger loads like bedding or if we have been boondocking for a while and need to catch up on laundry quickly. However, we are pretty sure we will be thankful to have an onboard washer/dryer.
Splendide 2100XC Installation
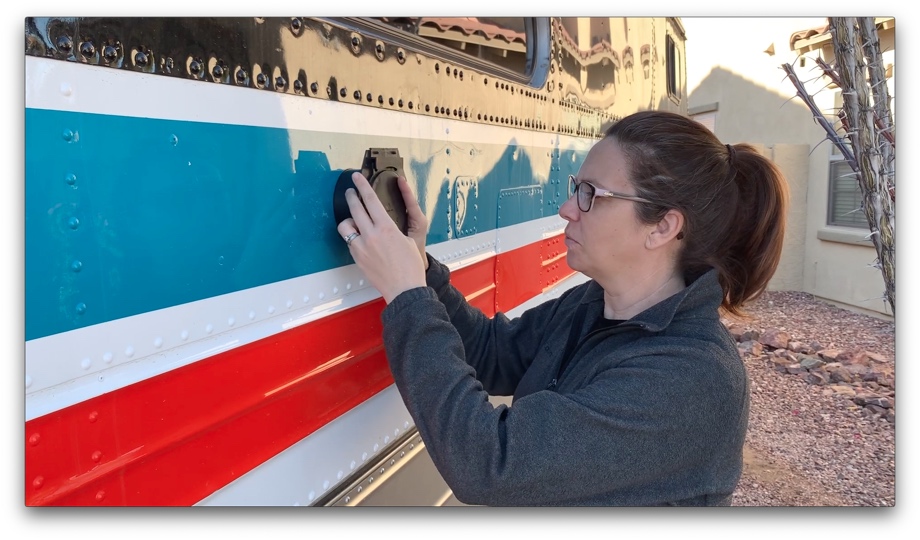
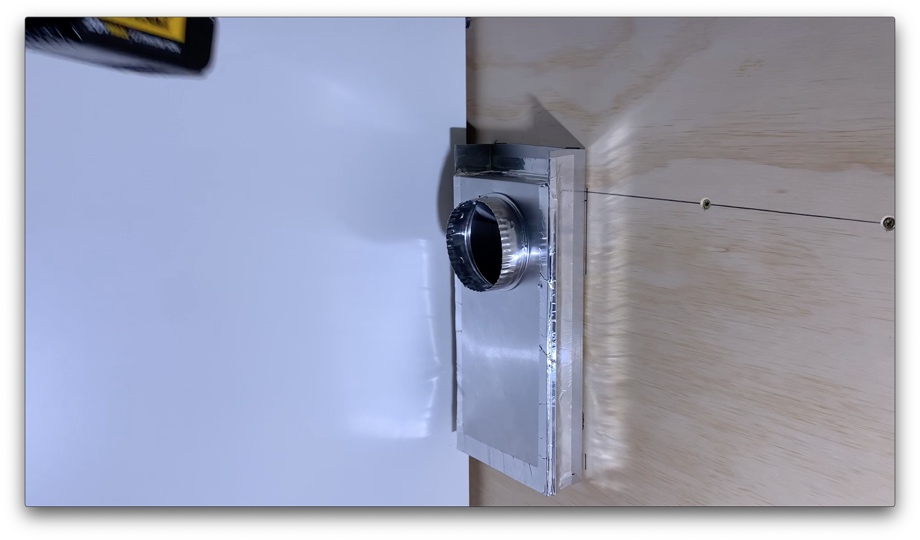
The first thing we had to do was install the dryer vent. This was the most nerve-wracking part of the install - drilling a 4” hole into the side of our bus. Because of the location of our window, we had to make the vent hole about seven inches lower than the vent location on the back of the dryer. To accommodate this, we used a vent periscope. We were able to cut it to fit our needs and tape it up using aluminum tape to prevent any air leaks. Once we drilled a hole through the side of the bus and another one through the inside wall, we were able to mount the periscope.
Next, we cut and plumbed in the standpipe to the drain line and Hepvo trap we installed previously. Then, we connected a ½” PEX-A to ½” Female Adapter with a ½” Male Thread to ¾” Garden Hose. These fittings then were connected to our Pex hot and cold lines.

Finally, we were ready to put all of the pieces together. First things first, we had to get this thing in the bus. It fits through the door, but it is heavy (150 lbs) and awkward. We knew the only way to do this safely was to buy some Forearm Forklifts. These are the most simple but best invention ever. Seriously, if you have to move heavy stuff, these are much cheaper than a chiropractor bill or a broken foot.

Once we moved the beast into the bus, we were ready to start connecting everything. We put an accordion dryer vent hose on the back of the dryer and attached that to the periscope. This will allow us to pull the unit out and away from the wall without detaching it from the periscope. We clamped the drain hose into the standpipe and secured it to the wall. Last, we connected the hot and cold supply hoses to the garden hose adapters on our Pex lines.

After pushing it into place, we needed to secure it. At 150 lbs., we do not want that thing to ever come flying out of place. Splendide sells brackets that attach to the adjustable front feet that are simply screwed into the floor. Since we are installing the washer/dryer onto our subfloor, we had to make a small adjustment to them so that they won’t interfere when we put in our final flooring. These brackets will prevent the machine from sliding. Our kitchen countertop will be over the top of the machine, which should prevent it from being able to tip forward.

We were so excited to finish this project, and we know that it will be such a functional part of the bus. Bonus, it is literally two steps from the washer/dryer to the closet to put clothes away!

Watch the video:
Click here If you cannot see the video.


0 Comments
Comments powered by Disqus