


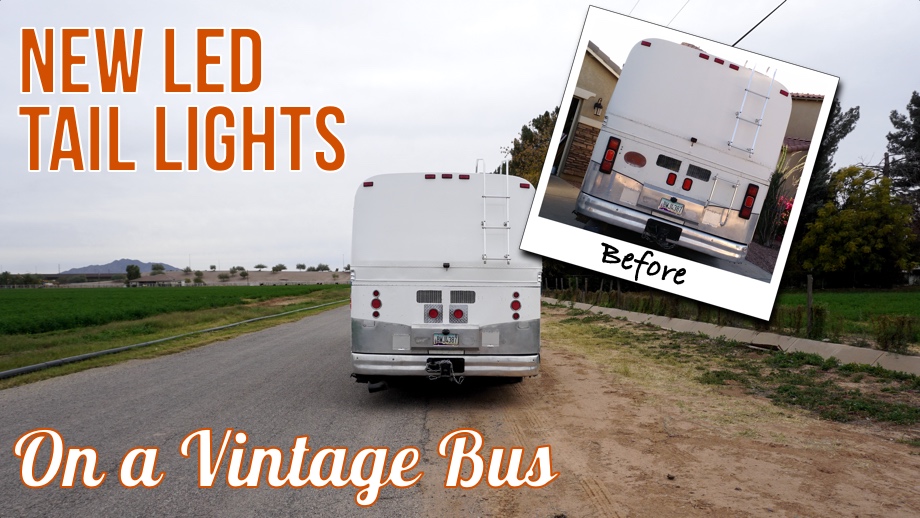
We never really loved the old tail lights that the previous owner had built. However, we hadn’t really thought about redoing the entire rear light setup. Last year, we had even simply switched out the old bulbs in all of those lights for LEDs. That definitely helped some. Unfortunately (or maybe fortunately), when the painter removed the previous light “contraptions”, they fell apart. Time for a redo.
 Because the rear of the bus is curved pretty severely on the sides, the previous lights had been built out onto a wooden structure that was then wrapped in some kind of thin metal “foil”. After years of weather, that wooden structure was completely rotten. We thought that if we could move the new lights slightly more toward the center, we could mount them on a spot that is flatter. This would allow us to place the lights directly into the rear of the bus and avoid building out a “stand”.
 Our goal in redoing these lights was to try to make them have a vintage vibe. We can’t go back to completely factory original lights because the rear engine cover of our bus has been rebuilt or replaced at some point. However, we could at least try to give it a more vintage bus-like look. Exit rectangular lights; enter round lights.
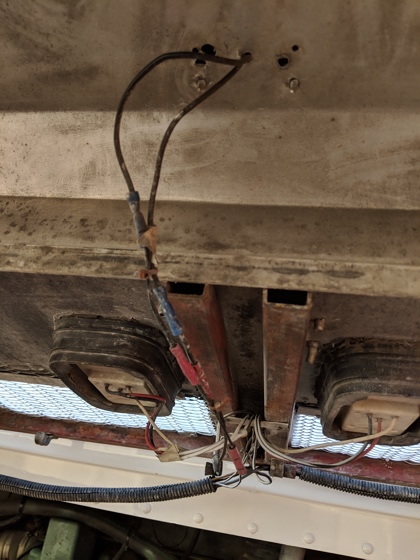
Since the previous lights were mounted onto a stand, the only holes in the rear of the bus were small ones for the wires and the mounting screws. We wanted to mount these new lights directly into the bus which meant cutting large holes into the metal. That’s a bit scary, to say the least. “Measure twice, cut once.” That’s the saying, I believe. For us, it’s more like “measure twelve different times with different devices, make multiple templates out of cardboard, aluminum, paper, etc., measure again a few more times, quadruple check everything, then cut.” Thankfully, all of our prep helped the cutting to go fairly smoothly.

 We decided on a combination of smaller 2.5” LED lights and medium 4” LED lights. All the lights function as running/marker lights. Only the 4” lights are brake lights and turn signals. These new round LED lights with stainless bezels are so much brighter and much more in line with the look we are after. Function first always, but the form is much better now.
We also had to completely redo the wiring for all of these lights. I can’t explain in words how frustrating it was to pull off the electrical tape and find splice after splice after splice with wires simply twisted together, not even soldered or anything. Also, wires just switched colors in the middle of a run. Chasing down all the wires was super fun. It’s a wonder anything worked. If there’s one thing that drives Juan crazy, it’s bad, sloppy, lazy wiring. Hence, we removed all the previous wiring and redid the whole thing. So much better!

 We are really happy with how this project turned out. Next up will be redoing the headlights and turn signals.
Watch the video:
Click here If you cannot see the video.


0 Comments
Comments powered by Disqus