


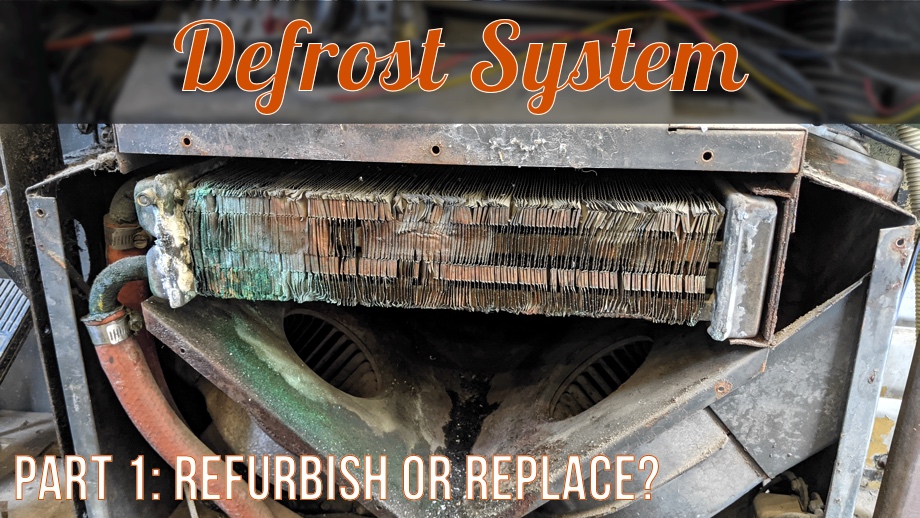
It seems like dash areas are one of the last places bus converters address (if they ever do). We are certainly no exception there. Part of the reason was that we didn’t want to ding and scratch up a nice new finished area coming in and out of the bus during construction. However, another big part of the delay was that we knew we had to address the original defrost system before we could do anything else up there -- and it was a mess. It was ugly, loud, and only partly functional. It had also clearly leaked at some point leaving behind a “lovely patina”. There was no more avoiding it. Finally, the time had come to address it. We really did not know what we were going to do. Could we fix it? Was it worth it? Should we replace it? If so, with what? So, we jumped in and started pulling this 57-year-old defrost system apart to answer those questions.
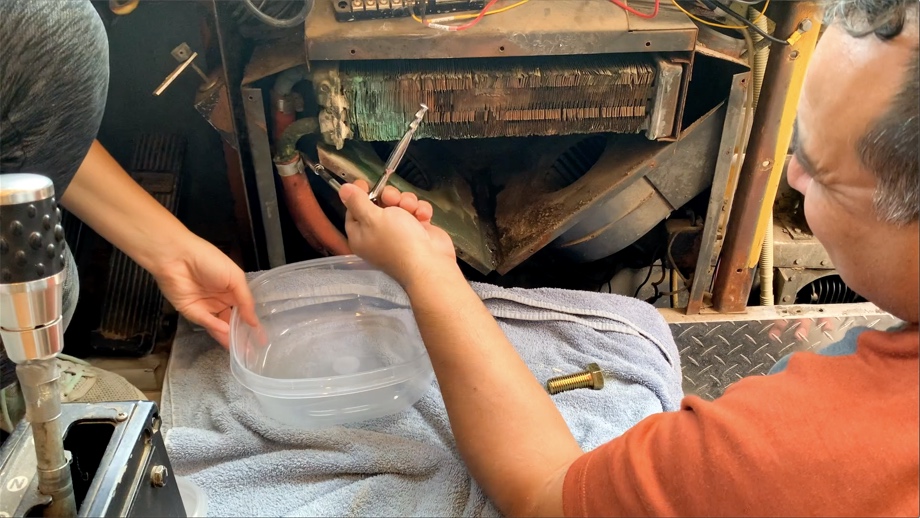
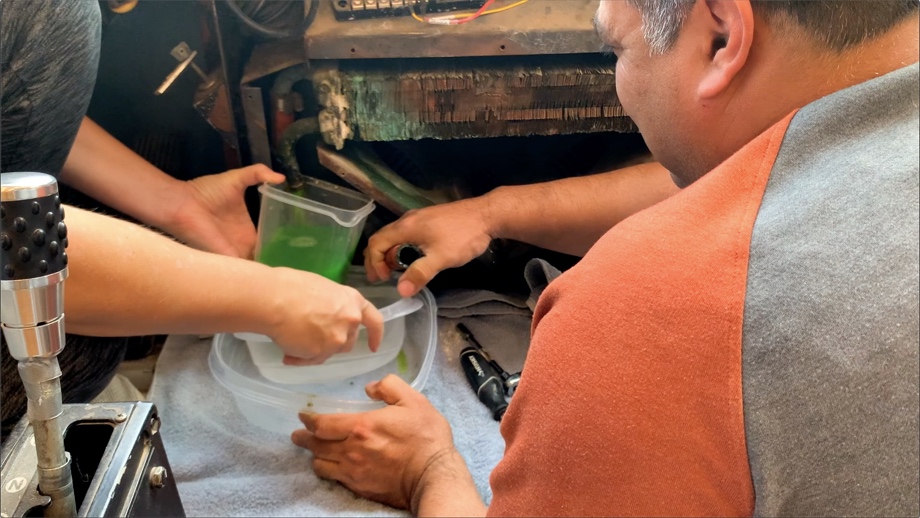
The starting point was pulling the hoses off the radiator so we could pull it out and start assessing the situation. We shut off all of the valves to the coolant lines, but we knew there would still be coolant in the radiator so we prepared ourselves with towels and plastic bowls to catch whatever came out. Juan unclamped the hoses and we caught as much coolant as we could, and then Juan stuck a big bolt in the line and clamped it shut.
There were no screws or anything holding the radiator in place, so once the hoses were off he was able to pull it out. It looked pretty bad.
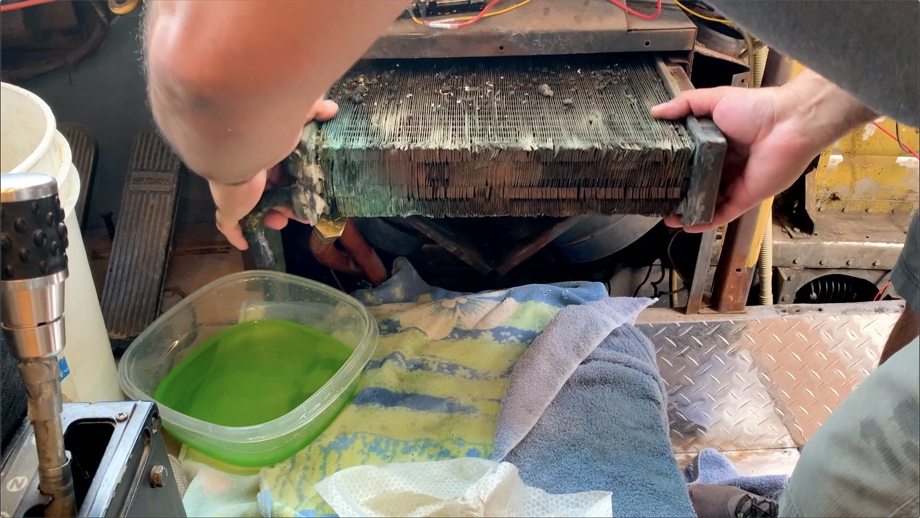
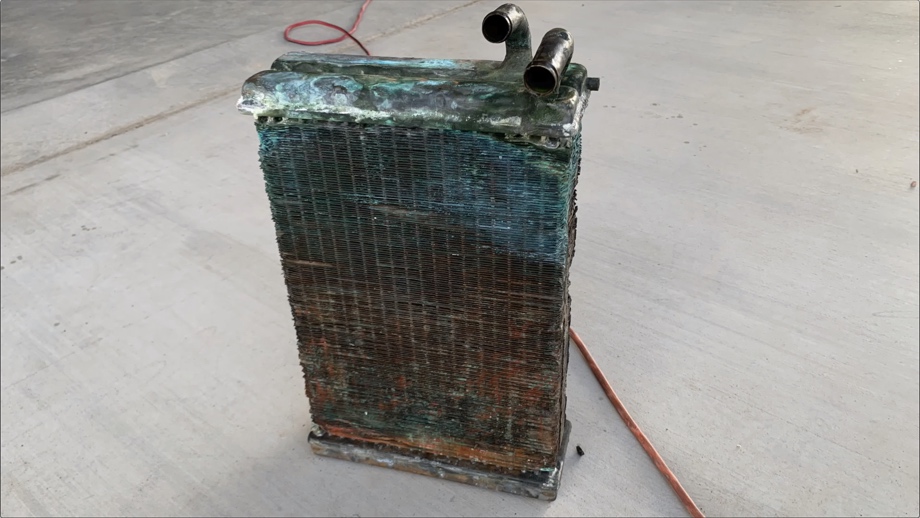
We decided to have a local radiator shop take a look at it and find out what could be done. Although it was not leaking anymore, it clearly had leaked in the past. The veins were not in great shape either. The guy at the shop said we should really get a new core, which would cost about $400-$500. Plus he would then have to add the end caps and the fittings plus put it all together, totaling about $700-$900. Or he could simply pressure test, acid wash, and braze the old one and do his best to clean it up for about $180. We chose option B to start with. Unfortunately, even all the cleaning he could do just didn’t make us feel comfortable enough to reuse it. Plus, we still would have to address the old blower motors that are extremely noisy and had seen better days. There was also a non-functional temperature control valve and all the hoses that needed to be replaced.
In the end, we decided to just scrap the whole thing and start from scratch. Hmmm...I think this defrost could be a metaphor for the entire bus.
After asking for some advice on some of our go-to bus Facebook groups, we ended up with two key ideas. First, we could retrofit a defrost system out of an old Suburban or similar. Second, a big issue with the old defrost system was that it was a giant metal box that acted as a large, inefficient heat sink -- we should really look at getting something with plastic housing. We did look into the Suburban defrost systems but they were about $250 pulled out of a wrecked car at a scrapyard. Cheaper than rebuilding the old radiator, but we kept researching. We started looking at aftermarket options. We came across these aftermarket systems made for hot rods. For about $200 we could have a brand new system that would work great for us with just a couple of modifications. Sold! Out with the old, in with the new.
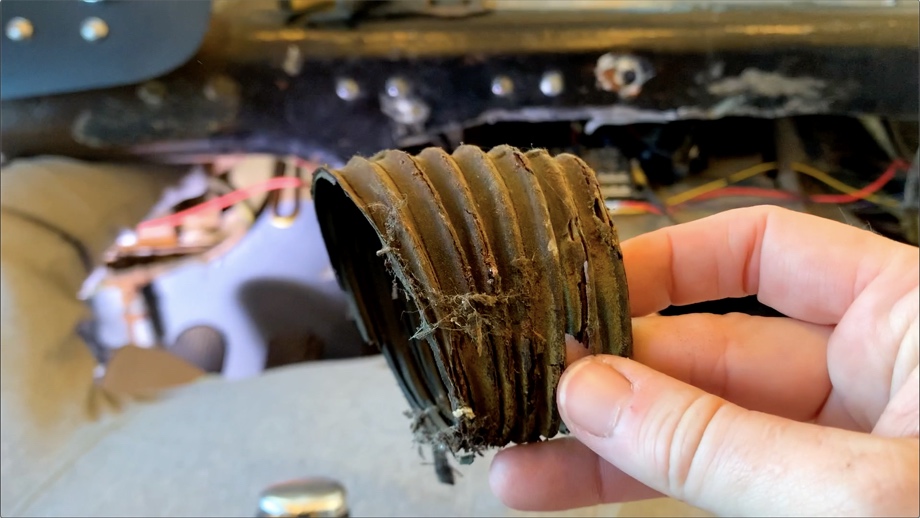
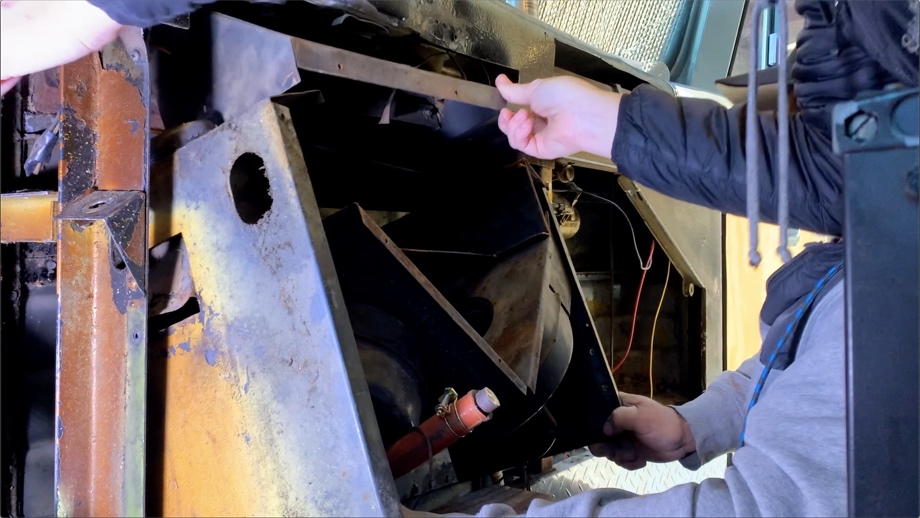
“Out with the old” proved a bit tricky to actually get out. Ha! It took quite a bit of finagling to remove the old motors and housing and vent hood. The old vent hoses were a whole other disgusting adventure (it reminded us of the day we were pulling out the old carpet in the bus - makes me queasy just thinking back to that day). They nearly disintegrated just touching them. After we finally removed everything we could really see the space we were working with and start making plans.
We purchased the defrost system and an additional hose kit that came with wyes and vents. We bought all new silicone hoses to replace the hardened old rubber ones. We bought a new temperature control valve. Lastly, we bought an additional pump. When the bus was in service and still had the original bus heating system, there was an auxiliary booster pump in the bay right behind the passenger front tire. It helped get the coolant from the back of the bus to both the heater core and the defrost system at the front of the bus. When the old heater system was removed, the pump was also removed.
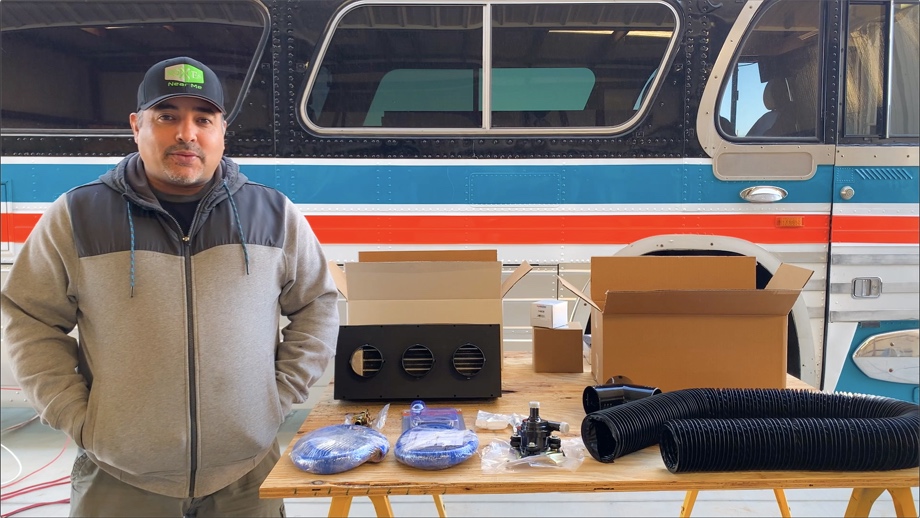
While many other 4106 owners use their defrost system without the booster pump, we figured it is a cheap and easy thing to add in while we are redoing it all anyway. We found that the 2005-2009 Toyota Prius have a small, simple, quiet, efficient inverter coolant pump that would be perfect for this application. Unfortunately, the one we purchased from Amazon didn’t come with the wiring harness necessary, so we returned it. Thankfully, we easily found one at a local Pick-a-Part for $12. About five minutes' worth of work and we were able to pull one out of a crashed Prius with the accompanying wire harness.
Finally, we had everything we needed to start putting together a new, more modern defrost system for our 57-year-old bus. The install will be coming up next.
Watch the video:
Click here If you cannot see the video.


0 Comments
Comments powered by Disqus