We are so, so close to sharing what we are starting on the inside of the bus. Before we were able to finally get started in there, we had two last projects outside we had to wrap up. Windows! This week we are talking about side windows; next week we will share about the windshield.
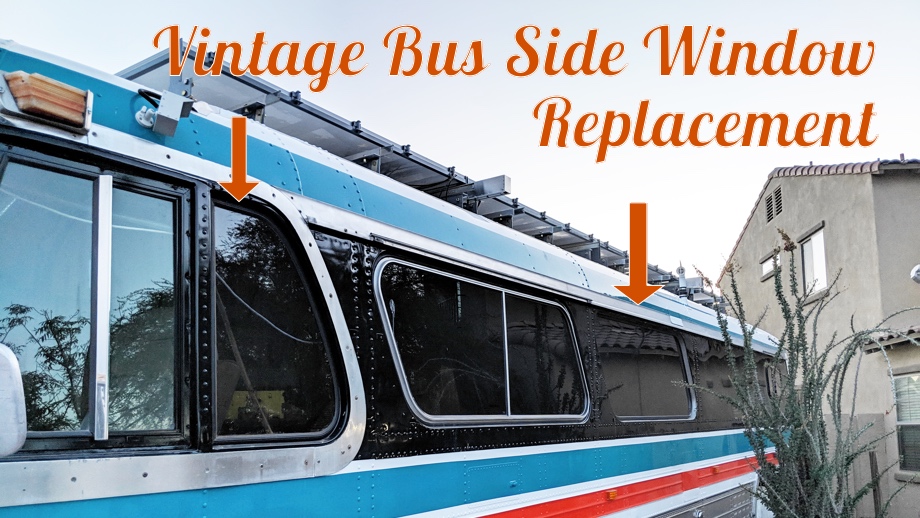
The D-windows were up first. These are the two "D" shaped windows on either side near the front of the bus. We knew that at a minimum we needed to change the gasket. It was rock hard and had been painted over multiple times. That gasket was long overdue to be replaced. The windows had a couple of tiny water leaks as well, so we needed to take a look at what was going on.
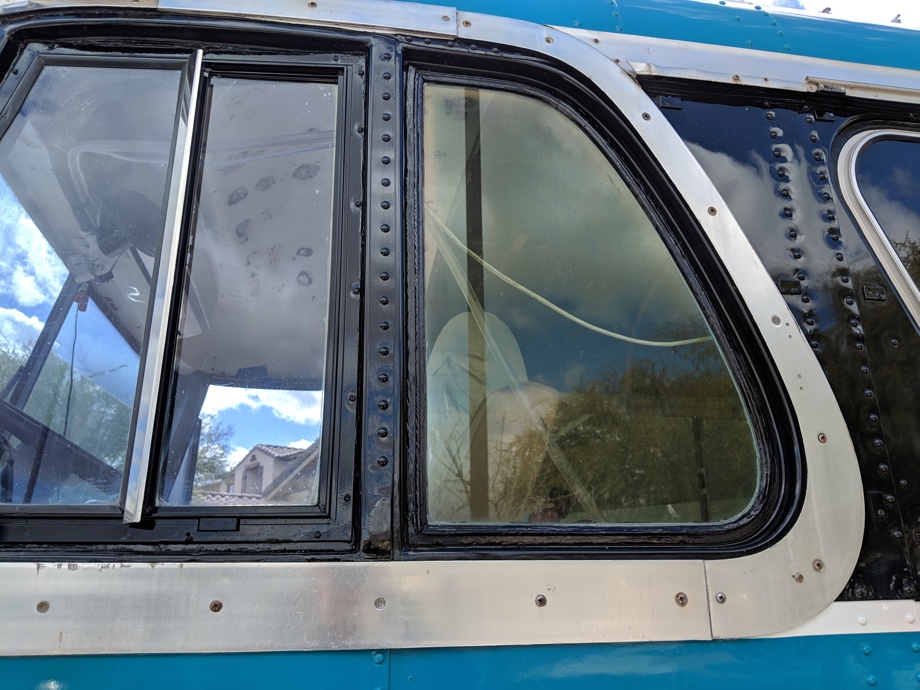
We, of course, ordered new rubber gasket from Luke at US Coach. In preparation, we watched as many videos as we could on how to install windows with a locking strip type of rubber gasket. Then, we jumped in trying to remove the old gasket. Oh man...it literally chipped off in chunks. It was solid and clearly hadn’t been replaced in an extremely long time.
Unfortunately, when we removed all of the old gasket and actually pulled the glass out, we realized why there were a couple of leaks. The glass had clearly chipped along the edges in a few places that were tucked up inside the gasket. Also, the glass was starting to fog and become discolored around the edges. Time for some new glass in addition to the new rubber.
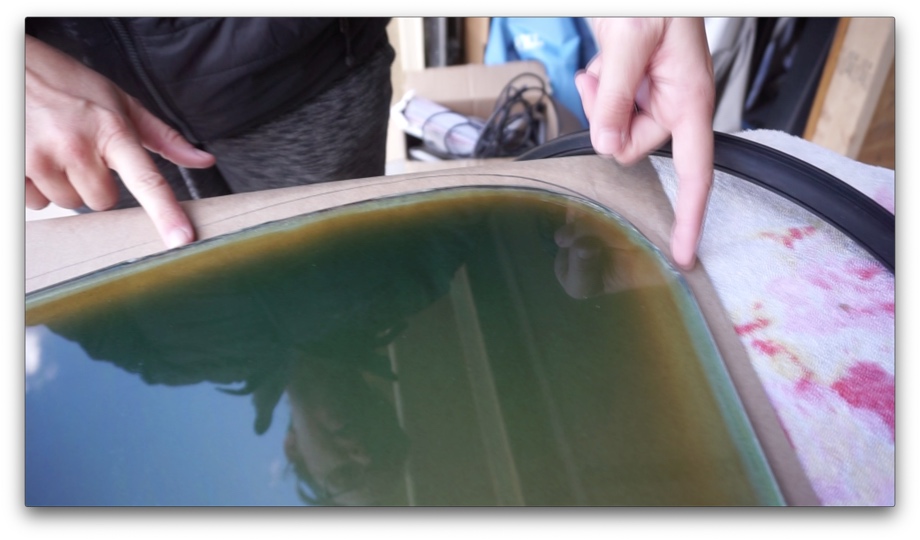
We found a local glass shop to cut the glass for us (it’s laminated safety glass). At first, we just took in a template of the window and the rubber gasket so they could make sure the new glass would be the correct fit. When we got there and talked to them, they said: “hey, just bring the bus to us and we will cut it here and make sure it’s a perfect fit, and then we can just install it for you.”
Now, normally, we don’t love outsourcing much. We did it with the paint, but pretty much everything else on this bus was done by us. But, hey, the price was right, and they could do it on a day that Juan had to be at work anyway, so it wasn’t going to cost us a “bus work day”. Score! We really liked the owner and the glass cutter/installer at the shop, so we decided to give it a go. We know we could have done it ourselves, but we have to admit, having some things done for you is pretty sweet sometimes.
We took the bus in a couple of days later on the way to work, and went back and picked it up on the way home with two brand new D-windows with new rubber locking strip. It looked great!
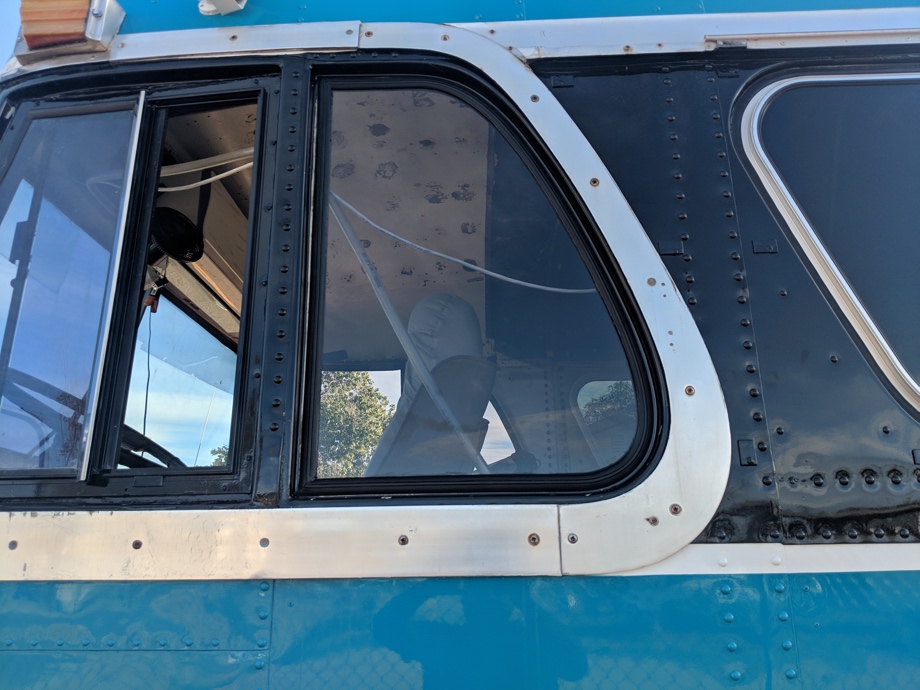
Next up, the big side windows. Some of the original side windows were removed in the original conversion back in 1980 or so. However, they did leave two of the originals in on each side. At some point, the front side windows were replaced with aftermarket Peninsula windows from Motion Glass. They are awesome sliding windows with screens that look and function great! The next set of side windows, unfortunately, was still the originals and had suffered over time.
When those windows were in their heyday, they could either slide or pop up and out. During the original conversion process, the previous owner had epoxied and sealed the windows shut. Most of the windows were covered up by cabinetry and the kitchen (which had a back mirror-covered wall that completely covered that window), so it didn’t really matter. Unfortunately, one of the windows was cracked really badly on the inside of the two pieces of glass (laminated safety glass is actually two pieces glued together with a safety film in between). Also, the glass was fogged and discolored and had bubbles inside.
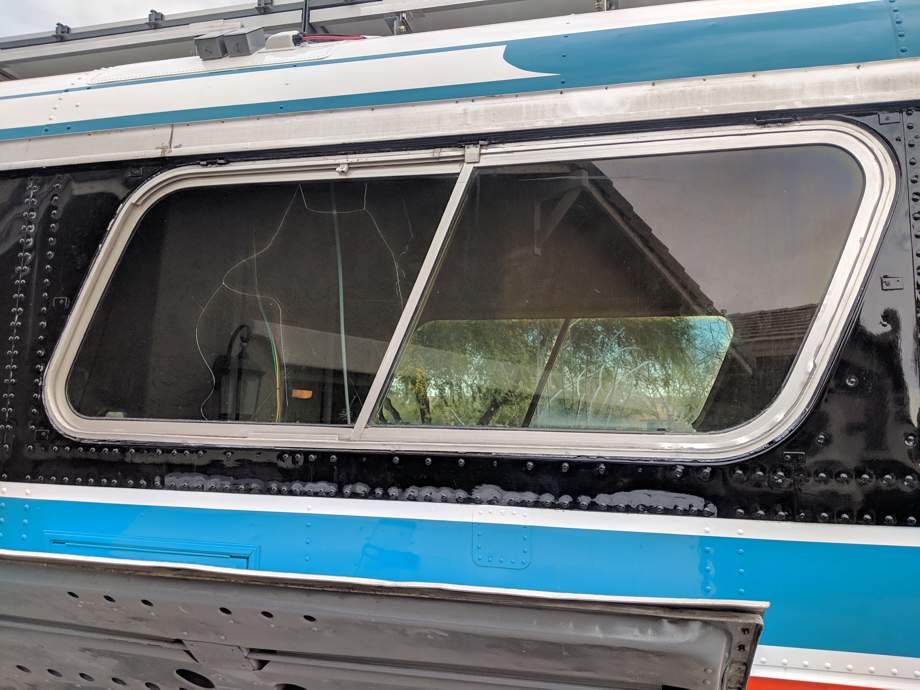
While we are planning on covering up some of these windows again, it won’t be as much as the previous owner had covered. We also knew that if we didn’t change these windows now, once we build out the inside fixing those windows would be a much bigger challenge. Motion windows no longer make the aftermarket side windows for our PD-4106 which would have been the number one choice if it was available. So the question became, could we save the window frames? Could we remove the glass from the original aluminum frames and have new glass cut and then reinstall.
We went back to our friends at the glass shop. They were willing to look at the frames and see if they were salvageable. Well, simply removing the frames from the bus turned out to be a fairly huge pain. The hinge pins at the top of the window were just stuck. Really stuck. We tried every trick in the book to get them out with no luck. Out came the grinder. Once we finally got one of the windows out, we took it to the glass shop and left it for our guy, Peter. We heard back exactly what we were expecting - these frames are way too far gone. To try to unseal them and repair any damage would take a long time with no guarantee we could reuse them at the end.
Thankfully, we have learned to always have a Plan B in our back pocket. Since we didn’t need these windows to open (they will be behind some cabinetry in places), we decided to just do a repeat of what we did with the D-windows. Inset a large sheet of glass with a rubber locking strip gasket. Luckily, the window has a lip all around it to make this work. Peter was happy to do this but had to special order the glass because it is much larger than the sizes of safety glass that they keep in stock at the shop.
Again, we took the bus to him on a day Juan had to be at work anyway, preventing us from losing a bus-working day. Peter and his crew were able to install both large side windows by the end of the day. They look great! We are so happy with how it turned out. It ended up being a great solution to our problem with the original windows. If that hadn’t have worked, we would have had to put sheet aluminum up and replace the window with an RV window. We love the shape of the original bus windows and so we're pleased to be able to find a fix.
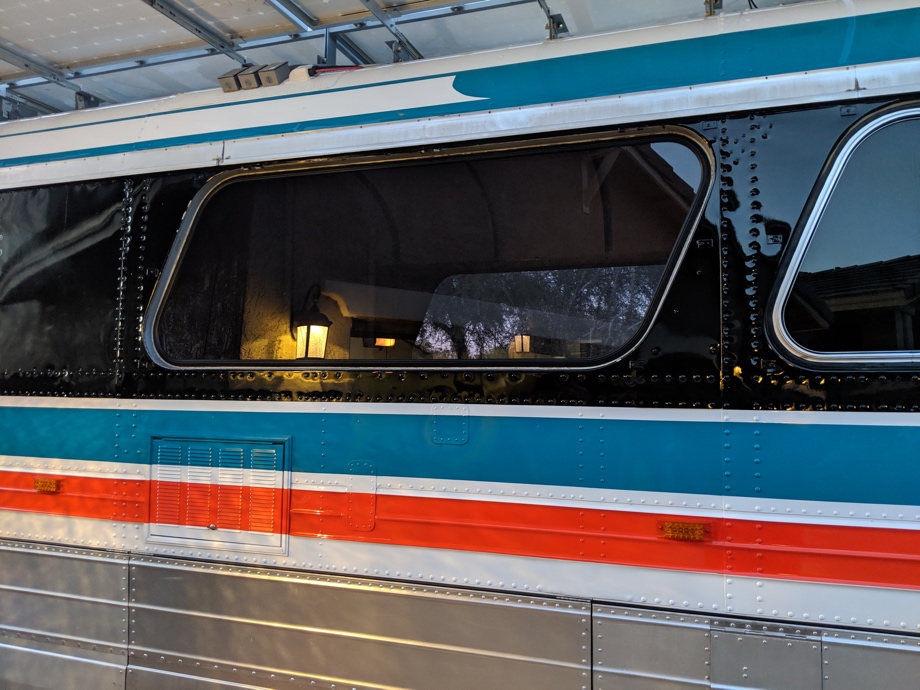
We will have to go back and paint the ledge around the window that shows now that the glass is inset rather than being flush with the sides of the bus. Another project for some other day.
Next week: windshield...and then we promise we are getting to the inside of the bus!
Watch the video:
Click here If you cannot see the video.



0 Comments
Comments powered by Disqus