


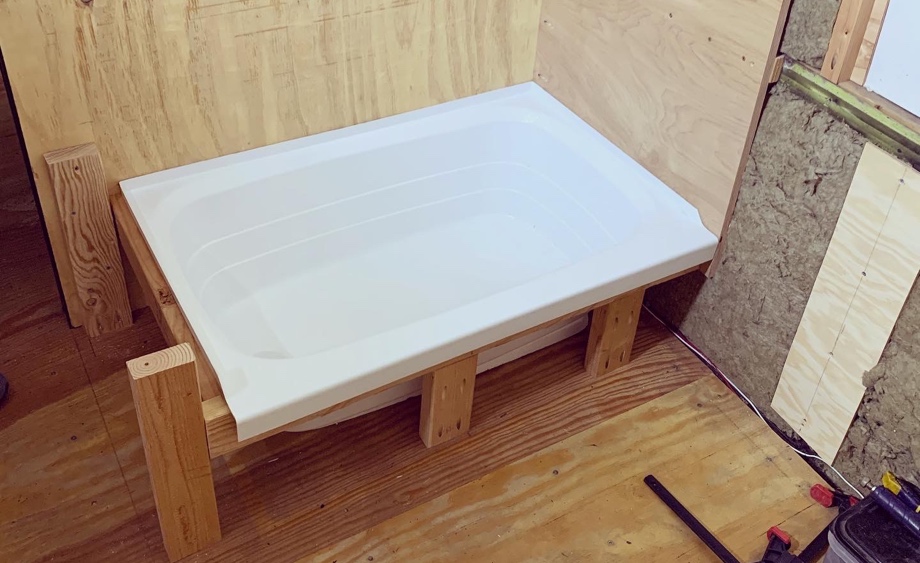
After spending many weekends working in the rear of the bus, we were finally able to move out of the kids’ room and start working our way forward. First stop, the shower. When we previously framed the bathtub, we decided that we would enclose the plumbing in the space between the tub and the “walkway”. We thought this would give us easy access to the plumbing in the future if we ever need to do a repair. Also, the enclosure would create a small “bench” seat/shelf next to the tub. We then roughed in the Pex lines the last time we had worked on plumbing. Finally, we were ready to finish the shower plumbing.
Although we have a little bathtub, we decided we didn’t really want a tub fill spout. First of all, we likely won’t be using it as a tub all too often (only our smallest kids even really fit very well in there anyway). Mostly, we don’t want something sticking that far out into the shower space that’s already fairly small (2’x3’). We chose to have a shower wand on a sliding bar for a showerhead that we can also use to fill the tub when necessary.
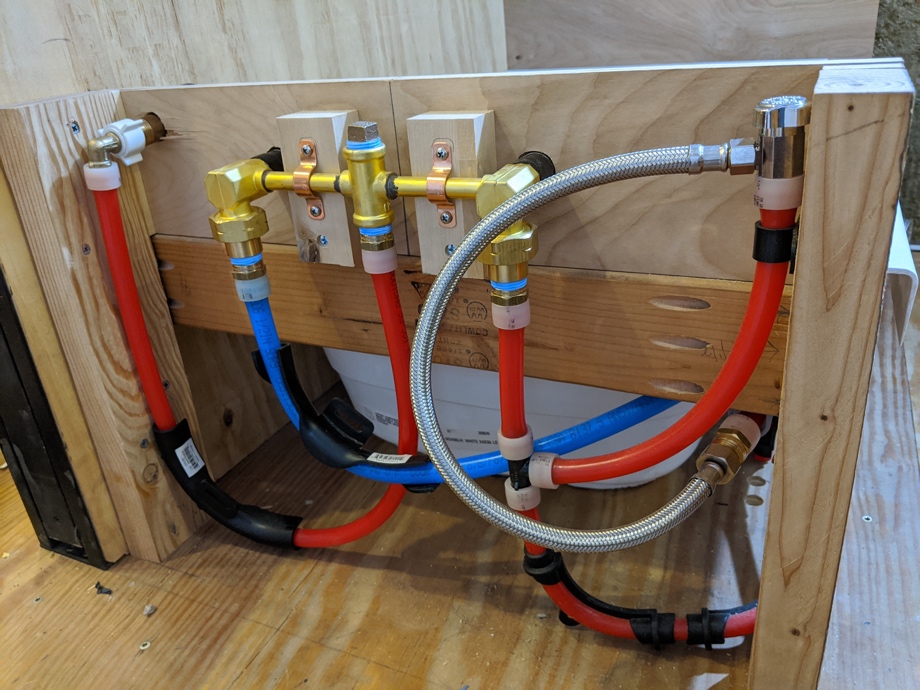
 For the plumbing, we chose manifold-style handles and fitting for the shower hose. (The manifold does also have an outlet for a tub spout that we just capped off.) To start, we determined where the handles need to come through the wall and drilled holes. Then, we needed to plane down a block of wood to mount to the back of the wall to provide a place to attach the manifold. Next, we attached the brass Pex-A fittings to the cold and hot valves, as well as the shower port.
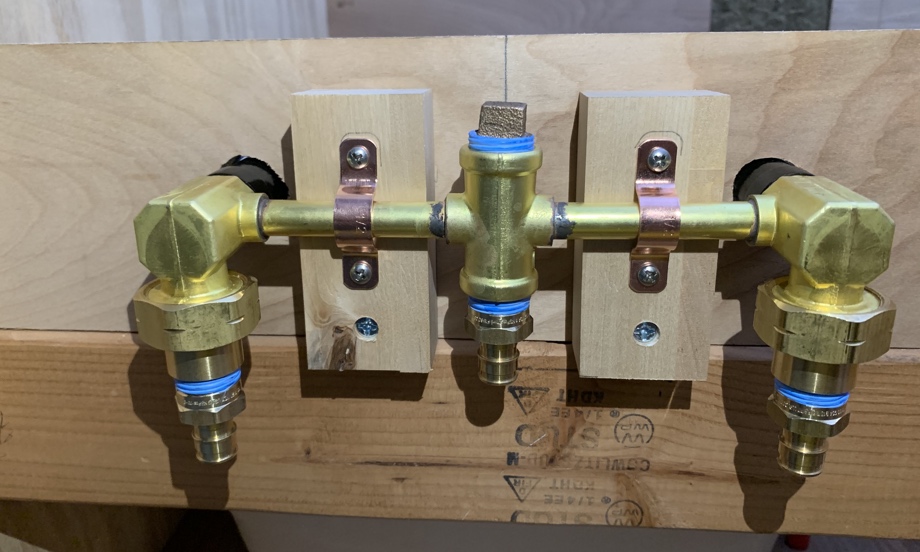
 Finally, we were ready to start plumbing in the Pex lines. We are continuing to love how easy it is to use the Uponor (Pex-A) fittings. In addition, we try to use bending supports instead of elbows whenever possible to minimize connections (places for potential leaks). The cold line was just one simple connection.
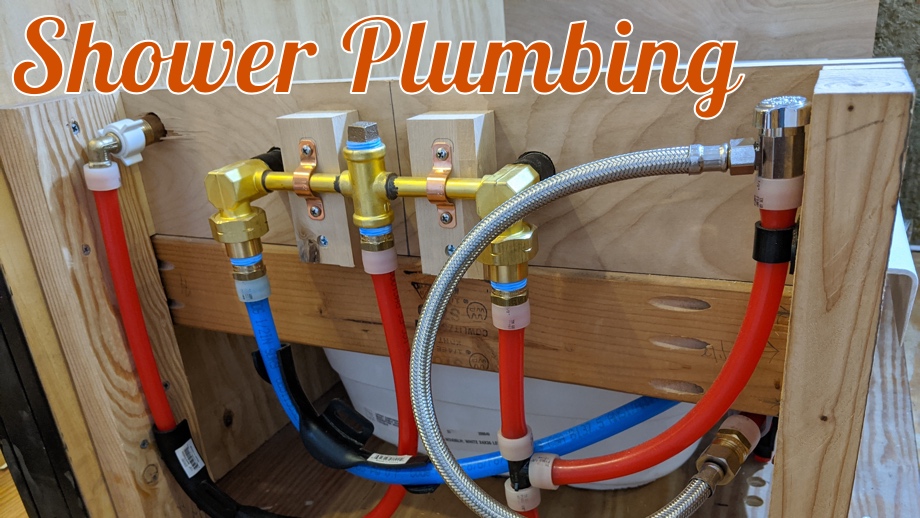
For the hot water, we added in a recirculating circuit. Basically, we tee’d off the hot water supply to a simple ¼-turn valve. This valve then is plumbed to a line that returns water directly to our freshwater tank. This will allow us to conserve water when we are boondocking. Instead of letting the water run while the hot water makes it from the heater through all the lines and to the shower, we can open the recirculating valve and redirect all that cold water back to the tank. Then, after however long it takes to get the hot water up to the shower, we can simply close that valve and have hot water right at the shower. Maybe it will take ten seconds, maybe thirty seconds, we will figure that out once we have the propane hooked up and the hot water running. It was a simple project though that will allow us to save as much water as possible when necessary. When we finish building out the shower, the top of the plumbing box will act as a small bench seat/shelf and will be hinged to easily access that valve.
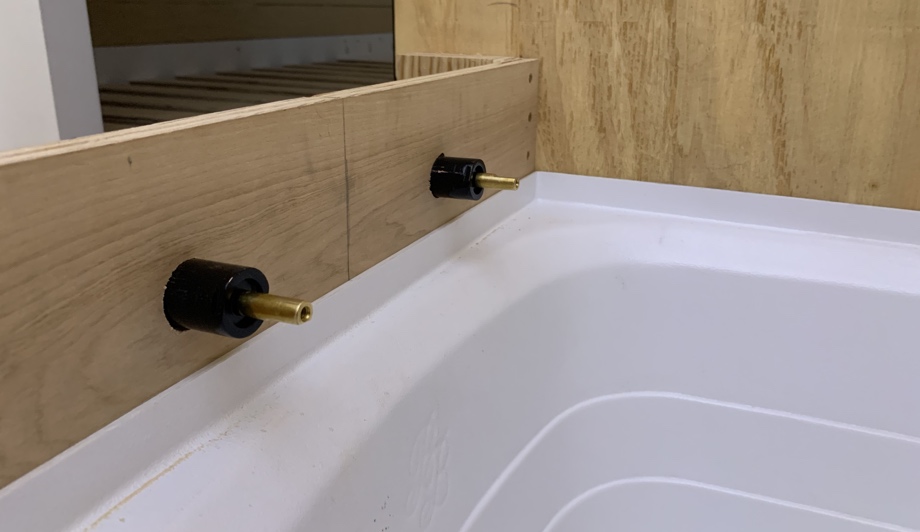
After plumbing in the cold and hot faucets and the recirculating line, the last step was the shower hose line. We bought a fitting that the hose will attach to on the front of the wall. This fitting is then attached to a brass nipple that goes through the wall and will be held on with a nut (once we finish the front of the wall). We then plumbed the Pex from the manifold to a swivel adapter that will screw on to that nipple.
With that, our plumbing in the bus is done. Once we tile the shower walls (another project for later in the build), we can put on the handles and the showerhead and actually test out this last bit of plumbing.
Next up: building the tub surround
Watch the video:
Click here If you cannot see the video.


0 Comments
Comments powered by Disqus