


Finally, we are ready to start tackling the plumbing. We need to secure our water tanks in order to begin plumbing the drains. However, before we could secure the tanks, we had to deal with the toilet plumbing. Everything we had read and seen told us to make the pipe from the toilet into the waste tank a straight shot. Do not have any angles in that pipe, lest you desire to end up with a clogged pipe. No, thank you. So, that was the first goal - run the pipe straight from the toilet into the waste tank. Then we could be sure the tank was in the exact correct position, thereby allowing us to secure the tanks.
About a year ago, we made a rough design of our bathroom with a best guess as to where the toilet would be. 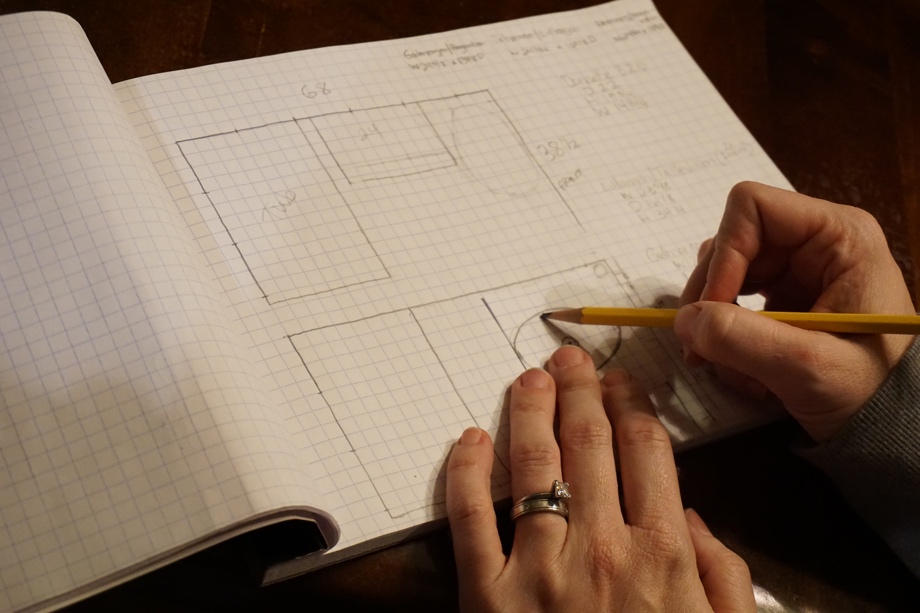
With measurements in hand, we designed and ordered custom water tanks from plasticwatertanks.com with the necessary inlets and outlets in our requested locations. 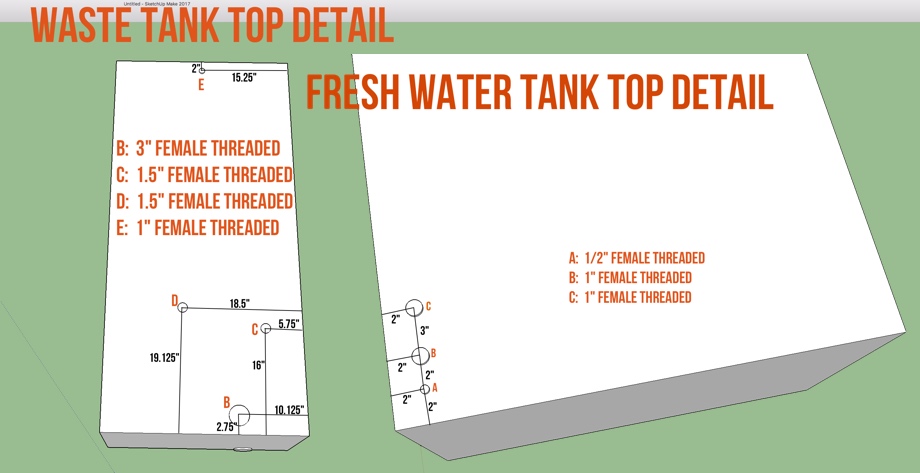
We planned for the toilet inlet in the waste tank to be directly under where we thought the toilet would be. 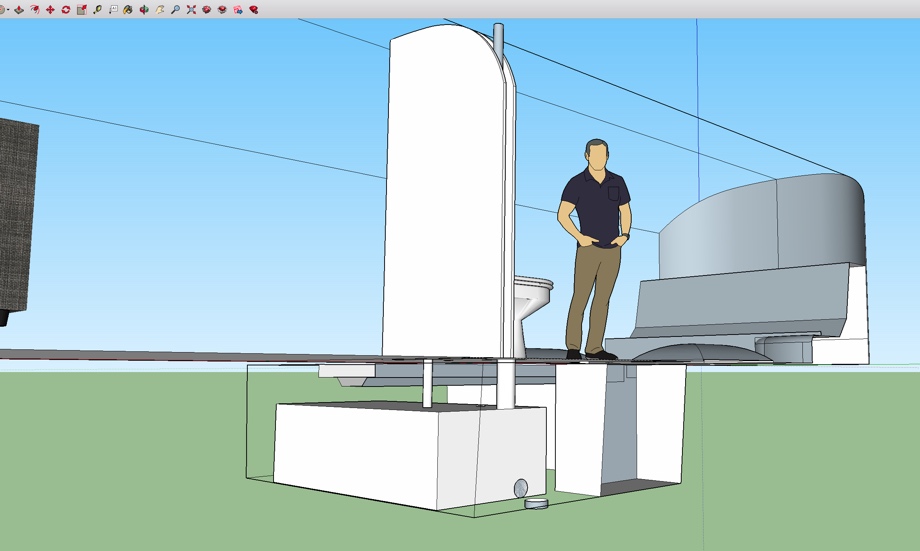
The time came to see if our measurements were close. In order to place the toilet pipe, we needed to know exactly where the toilet would sit. But, in order to know the exact location of the toilet, we needed to know exactly where the wall behind the toilet would be placed. But, in front of that wall is going to be a pocket door. Next to the pocket door, enclosed in between walls, is the vent pipe. Therefore, we needed to line up the pocket door hardware with that pipe. First, we needed to figure out how to mount the pocket door hardware before we could plan the wall. So, down the rabbit hole we went. We will tell you in the next post about how we built a mounting bracket for the pocket door hardware, but for now, just know that we did that part first, then mocked up a wall, then we brought the toilet into the bus and took measurements.
Finally, after backtracking a few steps, we knew where the toilet hole needed to be drilled. First, we started by drilling a pilot hole. Miraculously, the pilot hole we drilled went exactly through the mark we had made a year before when we made our best guess at where the toilet would be.
Next, we needed to drill a 4” hole to place the 3” toilet flange. Large hole saws are a huge pain. Maybe there is a trick to drilling with a large hole saw, but we haven’t figured it out yet. We have multiple drills, but only one with a ½” chuck, which happened to be the size we needed for the hole saw. That drill was Juan’s dad’s big, huge drill. Unfortunately, our poor old drill met its untimely demise drilling this hole. Luckily, Juan didn’t get hurt, but that hole saw was starting to buck all over the place. It kept binding up, and then literally broke the handle of the drill apart.
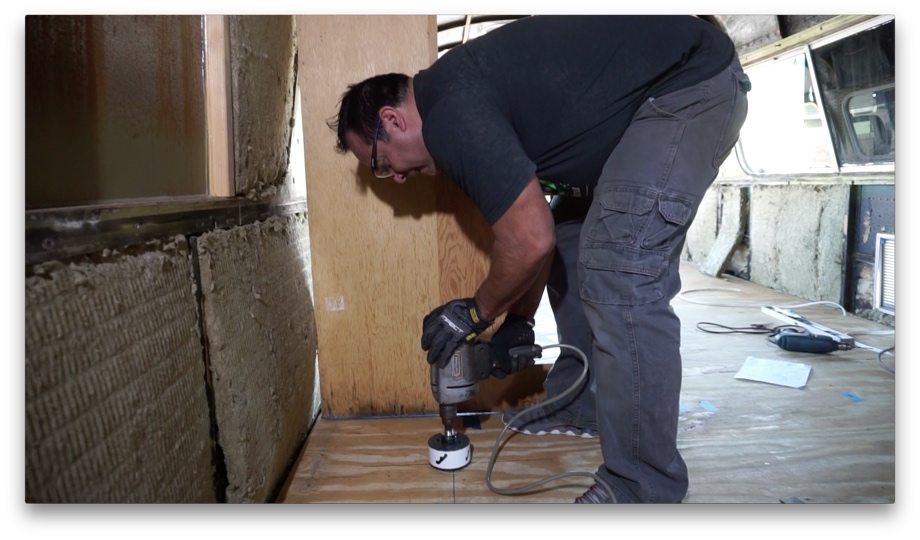 Juan did some research and found out that it helps to drill some relief holes before you drill through with such a large hole saw. He tried that (with a new drill), and it helped some, but was still difficult.
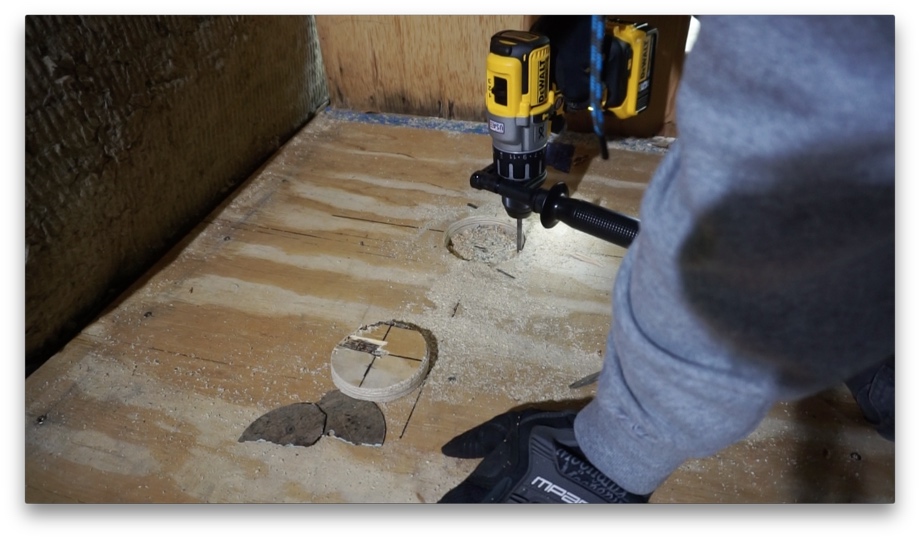
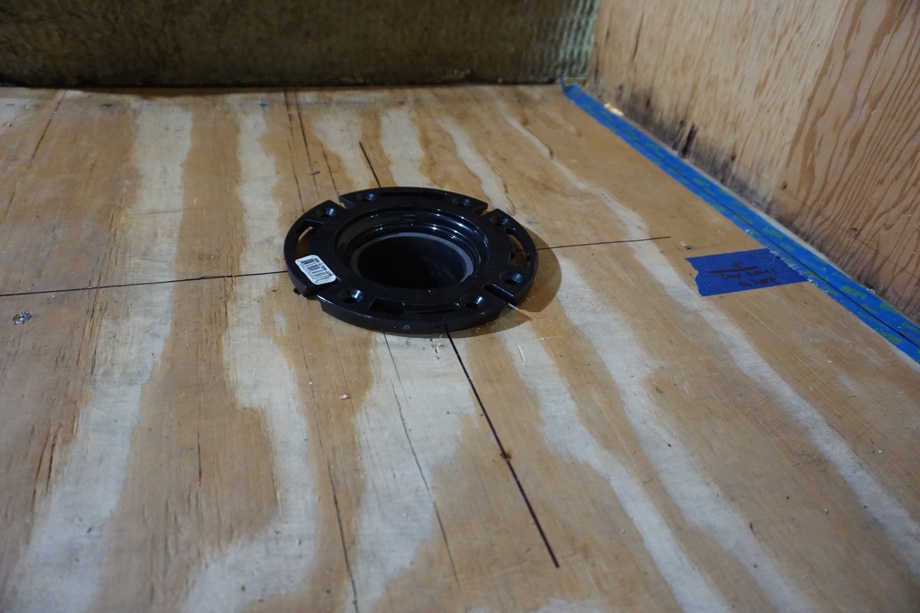
He finally got the hole drilled through and we set the toilet flange in place.
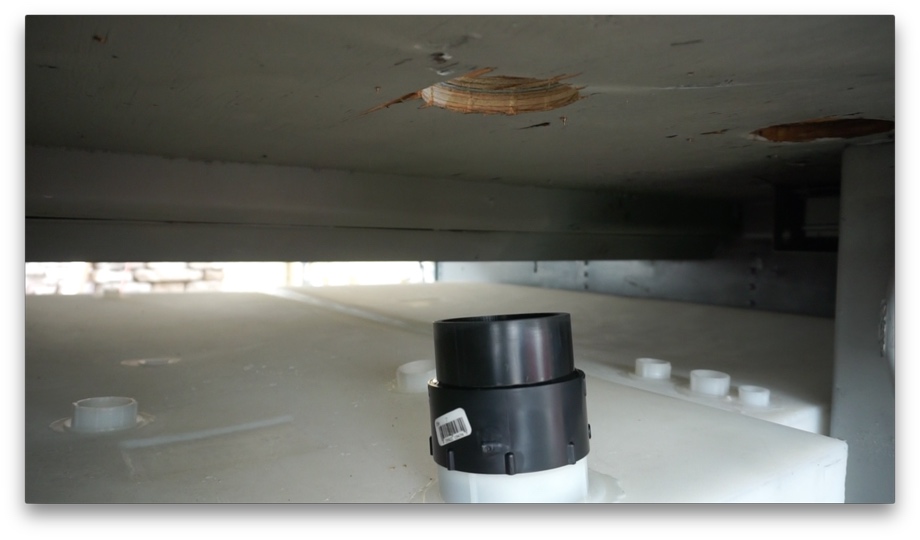
Moving outside to the water bay, we lined up the tank with the inlet under the hole. Time to assemble the “Poop Pipe”, as our kids keep calling it. The first piece to install was a 3” ABS threaded coupler that we simply screwed into the inlet (with teflon tape) on top of the tank. Next, we took our large piece of 3” ABS pipe and fed it down through the toilet flange until it met up with the coupler, allowing us to take some measurements and make some cuts. First, we cut a small piece of that pipe and secured it to the coupler with ABS cement.
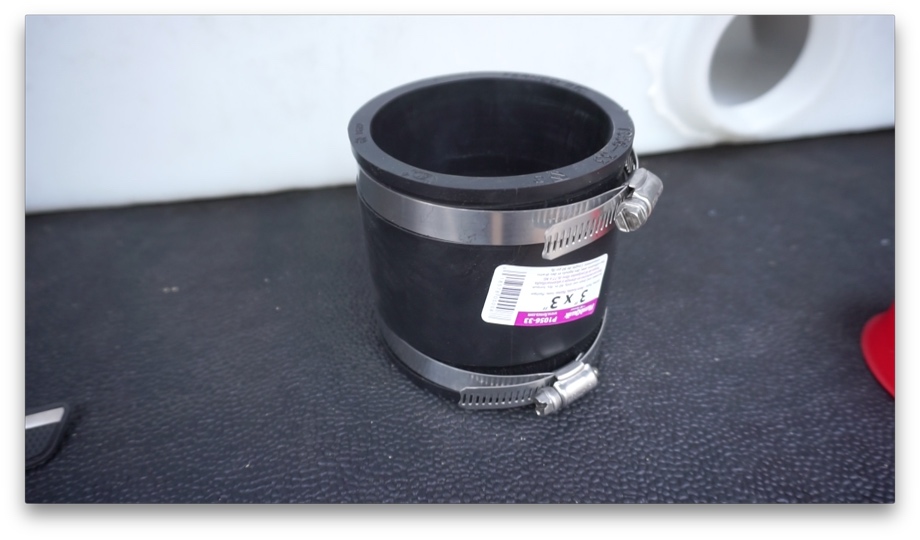
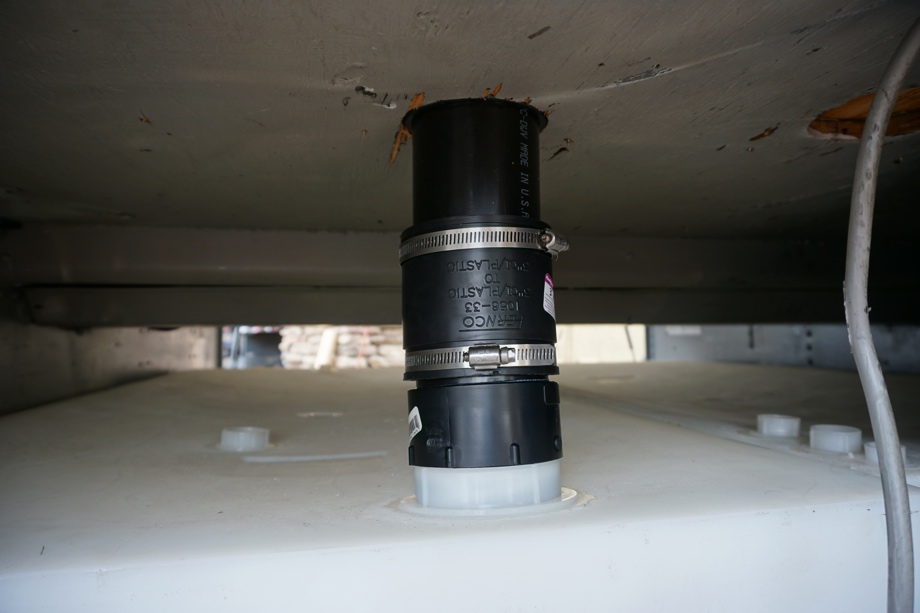
The next piece in the “poop pipe” was a 3” flexible rubber coupler. We decided to use this rubber piece for a few different reasons. First, it flexes. In a house you don’t have to worry about your pipes bouncing around, but bumping around down the highway in an old bus, it’s something to consider. Having part of the pipe that can “give” a little will hopefully prevent any cracks due to movement. We have spoken with some other bus converters, and they have used these flexible couplers with great success and no leaks for years. Another reason we chose to use this flex piece is because it will allow us to simply loosen the coupler, slide it up, and remove the tank if that need ever arises without having to cut and remake the pipe. The last reason to use this flex piece is because the top of our tanks are not perfectly flat. In fact, they are very slightly concave, so the inlet is not 100% straight up and down. It leans just a bit. Having the flexible coupler makes up for that and allows the rest of the pipe to be straight.
We temporarily placed the rubber coupler onto the short piece of pipe. Then, we took a measurement from the middle of the rubber coupler to the top of the toilet flange. We had to account for a few things. First, we wanted to leave a slight gap between the two hard pieces of pipe inside the rubber coupler to allow for that movement. Also, we will not secure the toilet flange to the bathroom floors until we have our final floors laid. Currently, we only have subfloors. Eventually, we will lay laminate or vinyl tiles or something that will have to go up under the toilet flange. So, we needed to leave room in the pipe to raise up the flange just a bit. We accounted for those things, and then cut another piece of the ABS pipe. Finally, we put that pipe into the rubber coupler and up into the toilet flange.
Right now, all the pieces are simply stuck together. We won’t secure all of the “poop pipe” together until we are ready to screw down the toilet flange. However, having it all in place allowed us to know the exact location of the waste tank so that we can begin to secure it. Once that tank is secured, we can begin running the drains for the sinks and shower.
It sounds silly, but we are getting excited to plan out all of the plumbing. We have lots of vague plans so far, but are starting to finalize the research and space plan all of the various components. If you have any plumbing tips or tricks, we would love to hear them in the comments.
Coming up soon: making a bracket to secure pocket door hardware to the roof, securing the waste tank, and installing the sewer drain pipe.
Watch the video:
Click here If you cannot see the video.
Parts We Used
4" x 3" Black ABS DWV Closet Flange
3" ABS-DWV Male Adapter
3" by 3" Rubber Flexible Coupling
3" x 2' Black ABS pipe


Tools we used
This drill is amazing
4" hole saw
Strap Wrenches
ABS Cement
Teflon Tape


0 Comments
Comments powered by Disqus